MiroTalk BRO - Self hosting
Description
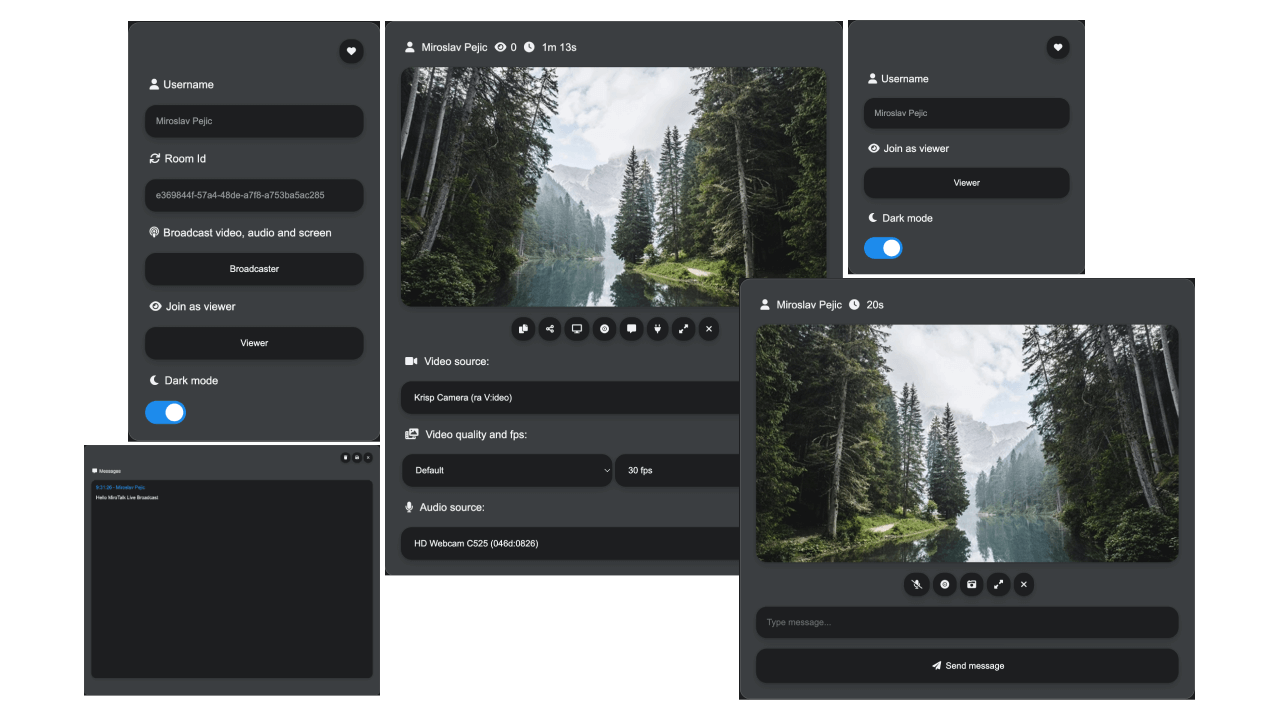
MiroTalk BRO is a one-to-many WebRTC broadcast platform for live audio and video streaming, ideal for webinars, live events, or educational sessions with minimal delay.
It supports two broadcasting modes:
- P2P (default) — Direct peer-to-peer WebRTC connections, best suited for small audiences.
- SFU — Media routed through a mediasoup server, better for many viewers (100+ users).
Live demo: https://bro.mirotalk.com
Requirements
- Server Selection:
- OS: Ubuntu 22.04 LTS.
- Node.js (LTS) and npm
- Domain or Subdomain Name (e.g.,
YOUR.DOMAIN.NAME) with a DNS A record pointing to your server's IPv4 address. - It is recommended to use a TURN Server. Installation documentation is available here.
Installation

Install NodeJS and npm using Node Version Manager
Quick start
# Clone the repository
git clone https://github.com/miroslavpejic85/mirotalkbro.git

# Navigate to the project directory
cd mirotalkbro

# Copy and customize the environment template
cp .env.template .env

# Install dependencies
npm ci

# Start the server
npm start
Verify the installation: http://YOUR.DOMAIN.NAME:3016
SFU Mode (mediasoup)

To enable SFU broadcasting, add the following to your .env file:
# Broadcasting mode: 'p2p' (default) or 'sfu'
BROADCASTING=sfu

# Mediasoup SFU Configuration
MEDIASOUP_NUM_WORKERS=            # Number of workers (default: number of CPU cores)
MEDIASOUP_RTC_MIN_PORT=20000      # Minimum RTC port for media
MEDIASOUP_RTC_MAX_PORT=20099      # Maximum RTC port for media
MEDIASOUP_LOG_LEVEL=error         # debug, warn, error, none

# Network settings (important for Docker/NAT deployments)
MEDIASOUP_LISTEN_IP=0.0.0.0       # IP to bind to (use 0.0.0.0 for all interfaces)
MEDIASOUP_ANNOUNCED_IP=           # Public IP to announce (required behind NAT/Docker)
Note
- Set
MEDIASOUP_ANNOUNCED_IPto your server's public IP when running behind NAT or Docker. - The RTC port range (
20000-20099) must be open for both UDP and TCP in your firewall.
Using PM2 (Process Manager)

# Install PM2
npm install -g pm2

# Start the server
pm2 start app/server.js --name mirotalkbro

# Save the process list
pm2 save

# Enable auto-start on boot
pm2 startup
Using Docker

# Install Docker and Docker Compose
sudo apt install -y docker.io
sudo apt install -y docker-compose

# Clone the repository
git clone https://github.com/miroslavpejic85/mirotalkbro.git

# Navigate to the project directory
cd mirotalkbro

# Copy and customize the environment template
cp .env.template .env

# Copy and customize the Docker Compose template
cp docker-compose.template.yml docker-compose.yml
Example of docker-compose.yml:
services:
    mirotalkbro:
        image: mirotalk/bro:latest
        container_name: mirotalkbro
        hostname: mirotalkbro
        restart: unless-stopped
        ports:
            - '${PORT}:${PORT}'
            - '${MEDIASOUP_RTC_MIN_PORT}-${MEDIASOUP_RTC_MAX_PORT}:${MEDIASOUP_RTC_MIN_PORT}-${MEDIASOUP_RTC_MAX_PORT}/udp'
            - '${MEDIASOUP_RTC_MIN_PORT}-${MEDIASOUP_RTC_MAX_PORT}:${MEDIASOUP_RTC_MIN_PORT}-${MEDIASOUP_RTC_MAX_PORT}/tcp'
        volumes:
            - .env:/src/.env:ro
            - ./app/:/src/app/:ro
            - ./public/:/src/public/:ro
Note
The mediasoup RTC port range is only needed when using SFU mode (BROADCASTING=sfu).
# Pull the official Docker image
docker-compose pull

# Create and start containers (add -d to run in background)
docker-compose up
Verify the installation: http://YOUR.DOMAIN.NAME:3016
Configuring Nginx & Certbot

To use MiroTalk BRO without the port number and with encrypted communications (required for WebRTC to work correctly), install Nginx and Certbot:
# Install Nginx
sudo apt-get install -y nginx

# Install Certbot (SSL certificates)
sudo apt install -y snapd
sudo snap install core; sudo snap refresh core
sudo snap install --classic certbot
sudo ln -s /snap/bin/certbot /usr/bin/certbot

# Configure Nginx
sudo vim /etc/nginx/sites-enabled/default
Add the following:
# HTTP — redirect all traffic to HTTPS
server {
    listen 80;
    listen [::]:80;
    server_name YOUR.DOMAIN.NAME;

    return 301 https://$host$request_uri;
}
# Test Nginx configuration
sudo nginx -t

# Enable HTTPS with Certbot (follow the prompts)
sudo certbot certonly --nginx

# Add Let's Encrypt configuration to Nginx
sudo vim /etc/nginx/sites-enabled/default
Add the following:
# MiroTalk BRO - HTTPS — proxy all requests to the Node app
server {
    # Enable HTTP/2
    listen 443 ssl http2;
    listen [::]:443 ssl http2;
    server_name YOUR.DOMAIN.NAME;

    # Use the Let’s Encrypt certificates
    ssl_certificate /etc/letsencrypt/live/YOUR.DOMAIN.NAME/fullchain.pem;
    ssl_certificate_key /etc/letsencrypt/live/YOUR.DOMAIN.NAME/privkey.pem;

    location / {
        proxy_set_header X-Forwarded-For $proxy_add_x_forwarded_for;
        proxy_set_header Host $host;
        proxy_pass http://localhost:3016/;
        proxy_http_version 1.1;
        proxy_set_header Upgrade $http_upgrade;
        proxy_set_header Connection "upgrade";
    }
}
# Test Nginx configuration again
sudo nginx -t

# Restart Nginx
service nginx restart
service nginx status

# Set up auto-renewal for SSL certificates
sudo certbot renew --dry-run --cert-name YOUR.DOMAIN.NAME

# Show certificates
sudo certbot certificates
Verify your MiroTalk BRO instance: https://YOUR.DOMAIN.NAME
Apache Virtual Host (Alternative to Nginx)

If you prefer Apache, configure it with the equivalent settings provided in this guide.
# Install Apache with Certbot
apt install python3-certbot-apache -y

# Set up SSL
certbot --apache --non-interactive --agree-tos -d YOUR.DOMAIN.NAME -m your.email.address

# Edit the Apache site configuration
sudo vim /etc/apache2/sites-enabled/YOUR.DOMAIN.NAME.conf
Add the following:
# HTTP — redirect all traffic to HTTPS
<VirtualHost *:80>
    ServerName YOUR.DOMAIN.NAME
    Redirect permanent / https://YOUR.DOMAIN.NAME
</VirtualHost>

# MiroTalk BRO - HTTPS — proxy all requests to the Node app
<VirtualHost *:443>
    ServerName YOUR.DOMAIN.NAME

    # SSL Configuration
    SSLEngine on
    SSLCertificateFile /etc/letsencrypt/live/YOUR.DOMAIN.NAME/fullchain.pem
    SSLCertificateKeyFile /etc/letsencrypt/live/YOUR.DOMAIN.NAME/privkey.pem
    Include /etc/letsencrypt/options-ssl-apache.conf

    # Enable HTTP/2 support
    Protocols h2 http/1.1

    <Location />
        # Proxy Configuration for Node.js App
        ProxyPass http://localhost:3016/
        ProxyPassReverse http://localhost:3016/

        ProxyPreserveHost On

        RequestHeader set X-Forwarded-For "%{REMOTE_ADDR}s"
        RequestHeader set X-Forwarded-Proto "https"
        RequestHeader set Host "%{HTTP_HOST}s"

        # Enable WebSocket proxy support for Socket.IO
        RewriteEngine On
        RewriteCond %{HTTP:Upgrade} =websocket [NC]
        RewriteRule /(.*) ws://localhost:3016/socket.io/$1 [P,L]
        # Adjust the WebSocket path according to your Socket.IO configuration
        # For Socket.IO 3.x or higher, use /socket.io/?EIO=4&transport=websocket
    </Location>
</VirtualHost>
# Check configuration
sudo apache2ctl configtest

sudo a2enmod proxy # Enables the `mod_proxy` module, which is essential for proxying HTTP and WebSocket connections.
sudo a2enmod proxy_http # Enables the `mod_proxy_http` module, which adds support for proxying HTTP connections.
sudo a2enmod proxy_wstunnel # Enables the `mod_proxy_wstunnel` module, which provides support for tunneling WebSocket connections

# Restart apache
sudo systemctl restart apache2
Updating Your Instance
To keep your MiroTalk BRO instance up to date, create an update script:
For PM2:
For Docker:
#!/bin/bash

cd mirotalkbro
git pull
docker-compose down
docker-compose pull
docker image prune -f
docker-compose up -d
Make the script executable:
To update your MiroTalk BRO instance to the latest version, run the script:
Changelogs
Stay informed about project updates by following the commits of the MiroTalk BRO project here