MiroTalk SFU - Vertical & Horizontal Scaling
Overview
Scale MiroTalk SFU to handle 100-1000+ concurrent users across multiple rooms.
Two simple options:
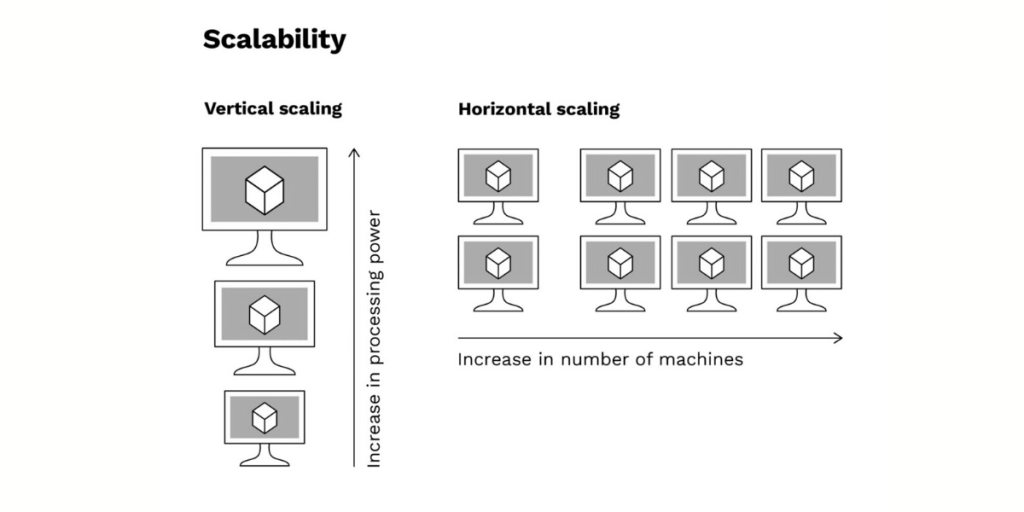
- Vertical Scaling: Single powerful server (50-100+ users)
- Horizontal Scaling: Multiple servers + Load Balancer (100-1000+ users)
Option 1: Vertical Scaling
Best for: 50-100+ concurrent users
Configuration
SFU_ANNOUNCED_IP=YOUR_PUBLIC_IP
SFU_SERVER=true
SFU_NUM_WORKERS=8
SFU_MIN_PORT=40000
SFU_MAX_PORT=49999
Capacity
- 4-core server: ~400 users (4 workers × ~100 users)
- 8-core server: ~800 users (8 workers × ~100 users)
- 16-core server: ~1600 users (16 workers × ~100 users)
Formula: numWorkers × ~100 users = capacity
Note
Official mediasoup docs state ~500 consumers per worker. In a typical room with N users sending audio+video, each user consumes 2×(N-1) streams. For 4-person room = 24 consumers total, so one worker can handle many rooms simultaneously.
Option 2: Horizontal Scaling + Load Balancer
Best for: 100-1000+ concurrent users across multiple rooms
Architecture
                Load Balancer (Nginx/HAProxy)
                    lb.yourdomain.com
                           |
        ┌──────────────────┼──────────────────┐
        |                  |                  |
     SFU #1             SFU #2             SFU #3
    1.1.1.1            2.2.2.2            3.3.3.3
    ~800 users         ~800 users         ~800 users
Key: Users in the same room stay on the same server (sticky sessions).
Step 1: Configure Each SFU Server
# Server 1
SFU_ANNOUNCED_IP=1.1.1.1
SFU_SERVER=true
SFU_NUM_WORKERS=8
SFU_MIN_PORT=40000
SFU_MAX_PORT=49999

# Server 2
SFU_ANNOUNCED_IP=2.2.2.2
SFU_SERVER=true
# ...

# Server 3
SFU_ANNOUNCED_IP=3.3.3.3
SFU_SERVER=true
# ...
Step 2: Setup Load Balancer
Nginx Configuration:
# /etc/nginx/sites-available/mirotalk-lb

upstream mirotalk_backend {
    hash $arg_room consistent;  # Hash on the ?room= query param - REQUIRED

    server 1.1.1.1:3010 max_fails=3 fail_timeout=30s;
    server 2.2.2.2:3010 max_fails=3 fail_timeout=30s;
    server 3.3.3.3:3010 max_fails=3 fail_timeout=30s;
}

server {
    listen 443 ssl http2;
    server_name sfu.yourdomain.com;

    ssl_certificate /path/to/cert.pem;
    ssl_certificate_key /path/to/key.pem;

    location / {
        proxy_pass http://mirotalk_backend;
        proxy_http_version 1.1;

        # WebSocket support
        proxy_set_header Upgrade $http_upgrade;
        proxy_set_header Connection "upgrade";
        proxy_set_header Host $host;
        proxy_set_header X-Real-IP $remote_addr;

        # Keep connections open for WebRTC signaling
        proxy_read_timeout 600s;
        proxy_send_timeout 600s;
    }
}
What Happens Here
hash $arg_room consistent; makes Nginx extract the room query parameter from the URL and use it as the hash key. Every user joining the same room (e.g., /join?room=xyz) is routed to the same SFU instance, regardless of other query parameters like name, audio, or video. If a server fails, only a few rooms are reassigned to other nodes.
Choosing the right hash key
hash $arg_room consistent;— Hashes only theroomquery parameter. Recommended for query-string URLs like/join?room=ROOM123&name=Alice.hash $uri consistent;— Hashes only the path (no query string). Works for path-based URLs like/join/ROOM123, but for query-string URLs the path is just/joinfor all rooms, routing everything to one server.hash $request_uri consistent;— Hashes the full URI including all query parameters. Two users joining the same room with different names would hash differently and could land on different servers.
HAProxy Configuration:
# /etc/haproxy/haproxy.cfg

frontend sfu_frontend
    bind *:443 ssl crt /path/to/cert.pem
    default_backend sfu_backend

backend sfu_backend
    balance url_param room  # Hash on the ?room= query param
    hash-type consistent

    option http-server-close
    option forwardfor

    server sfu1 1.1.1.1:3010 check ssl verify none
    server sfu2 2.2.2.2:3010 check ssl verify none
    server sfu3 3.3.3.3:3010 check ssl verify none
What Happens Here
balance url_param room makes HAProxy extract the room query parameter and use it as the hash key, so all users joining the same room are routed to the same backend. hash-type consistent ensures smooth failover if a server goes down — only a few rooms are reassigned. Each SFU instance handles its own rooms independently with full WebSocket and SSL support.
Step 3: Configure Firewall
# Check the firewall Status: (active/inactive) If active then allow traffic
ufw status

# On each SFU server
sudo ufw allow 3010/tcp
sudo ufw allow 40000:49999/udp

# On load balancer
sudo ufw allow 80/tcp
sudo ufw allow 443/tcp
Step 4: Test
# Check individual servers
curl https://1.1.1.1:3010/
curl https://2.2.2.2:3010/
curl https://3.3.3.3:3010/

# Check load balancer
curl https://sfu.yourdomain.com/
Deploy 3-Node Cluster in 30 Minutes
On each server (1.1.1.1, 2.2.2.2, 3.3.3.3) just follow the self-hosting guide here
On load balancer server:
# Install Nginx
sudo apt update
sudo apt install -y nginx certbot python3-certbot-nginx

# Get SSL cert
sudo certbot --nginx -d sfu.yourdomain.com

# Configure (use Nginx config above)
sudo nano /etc/nginx/sites-available/mirotalk-lb
sudo ln -s /etc/nginx/sites-available/mirotalk-lb /etc/nginx/sites-enabled/
sudo nginx -t
sudo systemctl restart nginx
Done! Access: https://sfu.yourdomain.com
Capacity Planning
| Setup | Concurrent Users | Cost/Month (€) |
|---|---|---|
| 1× 8-core, 16GB | ~800 | €14-20 |
| 3× 8-core, 16GB + LB | ~2400 | €47-65 |
| 5× 8-core, 16GB + LB | ~4000 | €75-105 |
Provider Comparison (8 vCores, 16GB RAM)
| Provider | Plan | CPU | RAM | Storage | Traffic | Price/Month |
|---|---|---|---|---|---|---|
| Hetzner | CPX41 | 8 vCPU | 16 GB | 320 GB SSD | 20 TB | €19.99 |
| Netcup | RS 2000 G11 | 8 vCores | 16 GB | 512 GB SSD | Unlimited | €17.99 |
| Contabo | VPS 20 | 8 vCores | 24 GB | 200 GB SSD | Unlimited | €14.00 |
Load Balancer Options
| Option | Cost/Month | Notes |
|---|---|---|
| Small VPS (Nginx) | €5-10 | 2 vCores, 4GB RAM sufficient |
| Hetzner LB | €5.39 | Managed, auto-scaling |
| Netcup VPS 500 G11 | €4.88 | 4 vCores, 4GB RAM |
Total Cost Examples

Premium Setup Hetzner:
- 3× Hetzner CPX41 (€19.99) = €60
- 1× Hetzner LB = €5.39
- Total: ~€65/month for ~2400 users
- ⚡ Best Performance: Hetzner - Premium network quality, best for production with high traffic

Balanced Setup Netcup:
- 3× Netcup RS 2000 (€17.99) = €54
- 1× Netcup VPS 500 (LB) = €4.88
- Total: ~€59/month for ~2400 users
- 🏆 Best Overall: Netcup - Perfect balance of price, performance, and reliability

Budget Setup Contabo:
- 3× Contabo VPS 20 (€14.00) = €42
- 1× Netcup VPS 500 (LB) = €4.88
- Total: ~€47/month for ~2400 users
- 💰 Lowest Cost: Contabo - Good for testing or budget-conscious deployments, but slower network
Bandwidth per user:
- Audio only: ~50–100 kbps
- SD video: ~300–600 kbps per stream
- HD video (720p): ~1–1.5 Mbps per stream
- Full HD (1080p): ~2–3 Mbps per stream
Need help?
Join our community forum and Happy Scaling! 🚀